Kelly D emailed me about tracing stamps so that you could cut out the shapes and then stamp right on the cutouts. She sells Close To My Heart stamps and wanted some tips. Fortunately, I’ve participated in a few CTMH hostess clubs and already had a number of their stamp sets. So, I pulled them out and selected one of my favorites: Flutter.

Next, in KNK Studio, I imported this scan and was careful to just left click once on the Sign Blank, rather than drag the cursor to the desired size. This will ensure the original sizes of the stamps are maintained. I then used the standard Accuscan method to auto-trace the image. I picked Logo-Long Lines and Curves as the default settings. After scanning and moving the vectorized image to the left of the original, the results were:
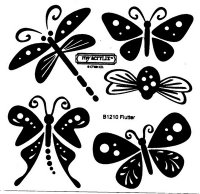
 I then deleted the original, used Arrange>Break Path on the tracing, and began to delete the extra detail not needed. What I wanted were just the overall exterior details of these insects:

 Also, you’ll see the tiny little interiors on three of the insects. I kept them on the two larger insects but deleted them on the butterfly. Again, you just use Arrange>Break Path to separate the detail and then you can go in and delete those little paths.
If any of you already own the CTMH Flutter stamp set, contact me at sandy@iloveknk.com and I will provide you the .knk file I created.


OHHHHHH SANNNNDDDEEYYYYY!!! You’re awesome!!! Ya done and made my day AGAIN! Thank you so very much!!!
Too funny! : P Glad you liked the stamp idea! It does work really well.
I typed my email address wrongly in the last comment! sorry Sandy – I did say I was computer challenged!
What a great idea! Pure Genius! I am stamp and computer challenged! but I am determined to overcome my difficulties.I will definitely try this, however, you have given me so many ideas I can’t decide what to try first!!!
You can also kep the original image and make it a print and cut and if you’re fast and use the right paper emboss the images out of the printer (just be careful using them this way as most stamps have a “handstamp only” policy for resale of products made with them), but works nice for your own cards or scrapbook pages to give out.
or…
you can make the outline the same size (although in the case of the ones you used Sandy I’d make it just large enough to make it all 1 piece cut out) and use the cuts for masks. Much easier than stamping one and hand cutting to use as a mask.
🙂
Thanks for this one Sandy, don’t know why I haven’t seen it before. Will definitely give this a go, I love my stamps, it will be nice to do something different with them.
Sandra
Oooooo I’ve never tried this before thanx for the tutorial I’ll give it a go 🙂
Oh this is so great! Thank you Sandy! I can’t wait to get all of my stamps converted now….(tee hee hee…both of my sets! I am also stamp challenged!
Georia will be happy because now I will probably buy more stamps from her!
A great idea! Thanks!
I’ve been asked about that as well and I was hoping that you could get a clear enough image with black ink to do a scan and proceed the same way. Thanks for letting us know. 🙂
I do this all the time for my stamp sets. You can also stamp the image in a nice, dark black ink & scan that in if you don't have a good image. I think if more stampers knew they could do this, they would want cutting machines. Thanks for another cool tutorial! Darcy :o)