A New “Twist” on Quilling

A while back, I found out about some Cuttlebug dies that allow you to create adorable flowers using a quilling tool. Now years ago, I had tried out the original quilling technique where you create all kinds of shapes by quilling long rectangular strips into little tight coils of paper and gluing them together. That was kind of fun, but didn’t excite me all that much.
However, when my close friend, Barbara Aras (who I affectionately call “Mom”) brought a set of the Cuttlebug quilling dies to our weekly Thursday Therapy crafting session, I was blown away with how beautiful and easy it was to cut and quill these “petal strips” into beautiful flowers! Then it occurred to me just how easy it would be to create my own custom flowers with different sizes and types of petals and leaves.
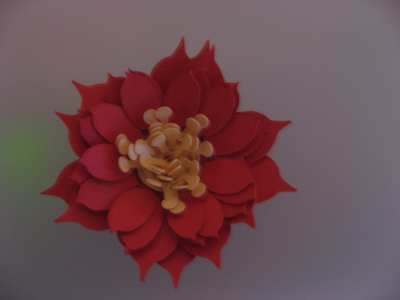
So, I’m sharing with you today, a base file that has a variety of flower centers, petals and leaves, which you can use for designing your own files. I’m also sharing three different completed flower files I designed and cut for the attendees at the recent San Diego retreat to do as a make and take. Here’s a photo of one of those:

Here are the files in KNK, SVG, and EPS formats:
Quilling Flowers in KNK format
Quilling Flowers in SVG format
Quilling Flowers in EPS format
Of course, the attendees were also taught how to take the base file and design their own! That’s the point of attending one of my retreats! : ) Fortunately, it such a simple process in KNK Studio, that I can show it in just a few screen quick shots:
Select a petal and size it to the height you want and then arrange over the left side of one of the rectangles. You’ll see, in the inventory file, that I have two sets of rectangles… pick from the upper set for shorter flowers or from the lower set for slightly taller flowers.

Next select the flower petal and go to Layout>Array. Make the following changes to your settings. Note that your spacing and the total number might vary from what I have. No problem! That’s the beauty in the designing of these flowers… it doesn’t matter!

Click screen shot to enlarge, then use back button to return
Now close that Array window, select your petals and rectangle and apply the Basic Weld. You’re done!

Now do another sized petal or a flower center or even a leaf. Just be creative and have fun!
Note, if you’re designing in a software program lacking something like the Array function in KNK Studio, then just manually copy/paste the petals and arrange along one of the rectangles. Then select all and weld. The petals do not have to be equally spaced in order to create one of these flowers!
For those who need to learn how to quill, here’s a link to one of the You Tube videos.
The only difference between my technique and what’s shown in this video is that I like to apply a small amount of adhesive (glue stick) along the strip before quilling to make it more secure. And, I also apply liquid glue to the bottom of my quilled flowers to make them even more permanent for a lot of handling (I do this since I take these flowers to demos, retreats, etc). Also, if you notice, as you are quilling that the petals seem to be clustering in the same spots, just unwrap a bit, and tear off the strip and glue down the end. Then move over a bit and start again so that the next petal will be positioned in one of the gaps in your pattern.
For those who do not own a quilling tool, here’s a link to the slotted quilling tool (Product 301) that I gave everyone at the retreat:
Also, I’ve learned that the Curling Coach (top right, Product 311) is supposed to be REALLY nice when quilling these flowers. I haven’t tried one yet, but I do plan to.
So… this is a VERY easy project! Have fun and feel free to send me any photos of beautiful flowers you’ve designed and created yourself.


