by Sandy McCauley | Aug 19, 2010 | Color Selection, Dongle, File Extensions, Free Videos, Hot Keys, License Files, Raster, Shortcuts
I’ve had a number of items on my To Do list for a few weeks and today was a great catch up day for making some miscellaneous videos.
Item Number 1: I’m going to once again BEG all of you to change a particular setting in Windows which hides your files extensions. Trust me… your “computer life” will be improved if you can see those little letter combinations which follow the name of a file. Sometimes, in a folder, you might find 5 files or more ALL with the exact same name! But they are vastly different files and even though you can usually figure out the type of file by looking over at the Type column, it’s MUCH faster to just see that file extension in the file name! In a prior post from almost two years ago, I explained how to do this in XP. But it’s a little bit different finding the setting in Vista or Windows 7, so I’ve made videos for both:
Showing File Extensions in XP
Showing File Extensions in Vista or Windows 7
Item Number 2: For those of you who haven’t back up your ACS/KNK/DM/GE license files, here’s a quick video to show you how to do it. For those with a dongle, it’s a good idea to have them backed up on a flash drive and even on a different computer, although you should be able to pull them from your installation CD. However, on ACS Studio, I believe the license files are now stored on the dongle itself. For those with dongle-less versions of the software, backing them up to another location on your C Drive is important in case you install an updated version of the software, which will wipe out your license files!!! If you don’t have them backed up, then it could be a 1 – 3 day wait (more over the winter holidays) before they can be regenerated if you lose them! So, make sure you copy them into a back-up folder. Again, I have made videos showing this for the different Windows operating systems:
Backing Up License Files in XP
Backing Up License Files in Vista or Win 7
Item Number 3: Now for something more fun! I recently read about a way to freeze raster images so that they cannot be inadvertently selected or moved. This is useful when you are manually tracing an image or editing a vector image that it still on top of the original raster. I made a quick video showing how to do this:
Freezing a Raster Image
Item Number 4: This is something I’ve been aware of since writing the first KNK User Manual, but somehow then forgot about it. In many of my videos you’ll see me select all images of a particular color by double-clicking the color on the Job Palette. It works fine… most of the time! But sometimes, for whatever reason, I will double click and it will just not select anything. There’s another short cut key which does the same thing: hold down the Shift key and click on a color on the Job Palette… same result. All images of that color will be selected. This is the new way of selecting by color I plan to always use.
Item Number 5: Another recent discovery that I think I already knew but had forgotten. Most of you know the usefulness and, in my opinion, the necessity of using a mouse with a middle scroll wheel for zooming in and out in the software. However, you may not have realized that pushing that middle scroll wheel will put you into the Panning mode so that you can pan around on your screen as necessary. Pushing it again will turn panning off. VERY handy!
by Sandy McCauley | Aug 3, 2010 | Clock Face - Designing, Designing, Free Videos

Colleen S. posted this request on the Klic-N-Kut Yahoo group and I jumped on it because, as always, I love new and different design challenges! She’s planning to install a clock directly onto a wall in her home and use vinyl for the numbers on the clock face. Her question was this: Is there an easy technique that will evenly space the numbers around the circle? So, I made a video showing the way I would do it:
Designing a Clock Face
But the project has another challenge to it. Because Colleen is designing this clock to be 18″ in diameter AND her KNK Groove-E can only cut up to 13″ wide, there’s the issue of how to get the cut lettering transferred to the wall and be line up just as she designed it in the software. I came up with the method I would use and made this video:
Transferring the Clock Design to the Wall
Now, I also wanted input from the other members and I did receive some great alternative ideas, so I’ll share them here. As usual, there’s more than one way to do just about anything, so it’s nice to have choices and pick the one that works best for you!
Michele’s suggestion (Thanks, Michele!) :
Here is my method. I make 2 circles and center them to the sign blank, then I make a line to bisect the circles. I center this to the sign blank as well. Next, I duplicate the line, center it to the sign blank and rotate it 30 degrees. I repeat this until I have all of the lines on my clock. I then create my numbers and use the center square (when the number is selected) to place it at the intersection of the line and the inner circle. When I’m done, I remove the lines. Then I make a very small circle and center it to the sign blank to identify the location for the hands of the clock.

Sharon’s suggestion (Thanks, Sharon!):
You could turn on your grid, Make a Square 18 x 18 and place your clock image in side, then you could take half and cut that, and cut the other half. And that should work to give you the correct spacing when you place on the wall.
If you have parts connecting in the image, just use the ginsu knife to separated.
Alisa’s Input (Thanks, Alisa!):
I did this recently. I used a circle, of the minimum diameter I needed and marked with a small circle at 12, 3, 6 and 9 as well as the centre. I actually did not even set it out in my software. I just cut my numerals and then using my circle, drew around it, directly on to the wall with a pencil. I then marked 12, 3, 6 & 9 and the centre. Then I adhered those numerals in place. Then using a ruler, I marked with the remaining numbers needed to be, making sure that the opposite number was in line with the middle.
by Sandy McCauley | Jul 20, 2010 | Free Videos, Hearts - Designing, Spirals

First of all, it’s ALWAYS important to give credit where credit is due. The ideas and methods shown in the video I created today came from a video class taught by Klo Oxford. While she didn’t invent this concept, she did take the time to figure out how to design them in her cutting program and I found her method of creating these spirals to be both brilliant and fun! And it’s relatively easy, too… just make sure you take note of each step and you should be able to create spirals from a wide range of shapes, such as circles, flowers, stars, apples, teddy bears, shamrocks, angels, wedding bells, grad caps, and more! 🙂
The video to learn how to do this in KNK and ACS Studio is here:
Creating a Spiral Card
If you want to watch Klo’s video class where she creates a really crazy fun card using stars and circles, then go here:
Klo’s Spiral Card Class
Finally, a big thanks to Lynn Keniston who emailed me about Klo’s video and, thus, prompted me to figure it out for KNK/ACS owners. Thanks, Lynn!!!
The video will show you how to design your spirals. Now for attaching to the inside of your card, here’s a quick method that worked great for me:
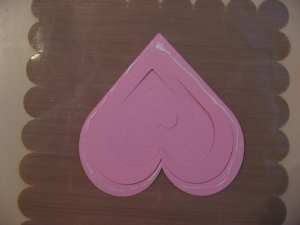
1. Decide where you want the spirals in your card. Note that they do not have to be centered. I do like the start of the spiral cut to be positioned towards the center fold:

2. Next, select either side (I chose the left side) and flip it over and apply glue around the outside edge only:

3. Adhere the spiral to the card and clean off any glue that might seep out along the sides.

4. Apply glue to the very center of the spiral, in the place where you want it to attach to the other spiral cut:

5. Place the front of your other spiral face down and centered on top of the first spiral cut. Then apply glue around the outside edge of that spiral:

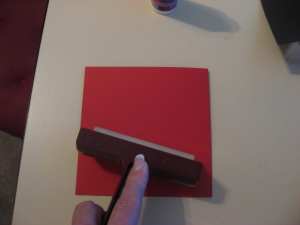
6. Close the card and then press firmly or use a brayer to make sure the newly glued piece will be adhered to the other side:

7. Open your card! You’re done!

by Sandy McCauley | Jul 6, 2010 | Borders, Cuttlebug, Free Files

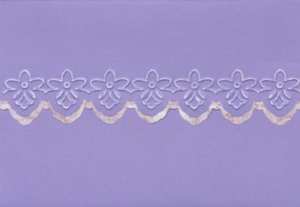
If you are a collector of the Cuttlebug border embossing folders, then you are going to LOVE Judy’s latest project and free gift to all of you. She has created cutting files to be used in conjunction with Cuttlebug embossing folders to produce greeting cards with cut edges to follow the contours of the Cuttlebug embossed borders. The cards can be folded to either produce regular side opening or top/bottom opening cards OR center opening as shown below.
There is a PDF tutorial included to explain how to create the cards, photos of the embossing folders, and (of course) the cutting files themselves. All you need are your digital die cutter, Cuttlebug embossing folders, and a Cuttlebug (or machine that will press Cuttlebug folders).
To download, please select from the following three formats:
Judy’s Cuttlebug Embossing Borders in KNK Format
Judy’s Cuttlebug Embossing Borders in AI Format
Judy’s Cuttlebug Embossing Borders in SVG Format
Thank you, Judy, for your time and effort in creating these files for the Cuttlebug owners! And thank you, Kylee, for suggesting this idea to Judy.

by Sandy McCauley | Jun 28, 2010 | Free Videos, KNK, Mac Users
This weekend was spent on two of the items that have been on my To Do list for a long time. First of all, I discovered that the WMV files produced by Camtasia Studio 7 are viewable on Mac’s! Since starting this blog over two years ago, I’ve heard from quite a few of my readers, who own Macs, that they REALLY wanted to be able to watch my videos without having to switch over to Windows. Well, check them out now! I converted almost a hundred videos this weekend to replace the ones currently at this site. And a BIG thank you to my dear friend, Jenn the Hacker, who was the one to discover that my latest videos were working on her Mac! : )
Since I had to re-upload all of these videos, I took the time to accomplish a second item on the To Do list, which was to reorganize the videos. I guess I’ve always had a bit of a hang-up about folders with too many files. When collecting anything in large numbers, I find a need to arrange them in some sort of orderly way to make finding what I need quicker and easier. I think they call it being “anal?” lol
So, all of the blog videos and miscellaneous other free videos have been arranged into a series of categories: Features, Designing, Editing, Text, Support, Import Export, and Rhinestones. And you’ll find links to these under the Support tab here (and then click on Videos). OR, you can just click on this link:
Free Videos
Note that the Support section will continue to grow as I remember specific tutorials I need to share, as well as new videos that need to be made. If you find anything you’d like to see added, be sure to let me know and I’ll do my best to make it available.


