by Sandy McCauley | Mar 3, 2011 | Array, Free Videos, Multiples, Repeats

Thanks to Stacey and Jennifer for asking this question within 24 hours of one another! What’s the easiest way to cut multiples of the same image?
Well, you actually have two choices and both are described in the KNK User Manual in Section 3.5. But, as usual, a picture is worth a thousand words and a video is worth 10,000! So, instead of reading the 391 words I wrote on this topic in the KNK User Manual, try watching these two videos, which cover the topic in MUCH more detail and provide you some extra tips, as well!
Creating Multiples Using the Array Function
Creating Multiples Using the Repeats Function
by Sandy McCauley | Oct 29, 2010 | Array, Free Files, Quilling

A while back, I found out about some Cuttlebug dies that allow you to create adorable flowers using a quilling tool. Now years ago, I had tried out the original quilling technique where you create all kinds of shapes by quilling long rectangular strips into little tight coils of paper and gluing them together. That was kind of fun, but didn’t excite me all that much.
However, when my close friend, Barbara Aras (who I affectionately call “Mom”) brought a set of the Cuttlebug quilling dies to our weekly Thursday Therapy crafting session, I was blown away with how beautiful and easy it was to cut and quill these “petal strips” into beautiful flowers! Then it occurred to me just how easy it would be to create my own custom flowers with different sizes and types of petals and leaves.
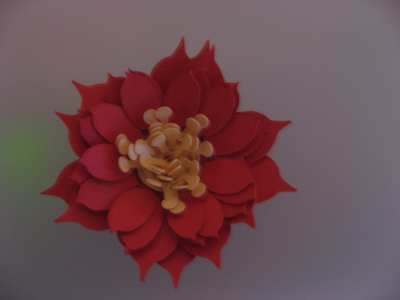
So, I’m sharing with you today, a base file that has a variety of flower centers, petals and leaves, which you can use for designing your own files. I’m also sharing three different completed flower files I designed and cut for the attendees at the recent San Diego retreat to do as a make and take. Here’s a photo of one of those:

Here are the files in KNK, SVG, and EPS formats:
Quilling Flowers in KNK format
Quilling Flowers in SVG format
Quilling Flowers in EPS format
Of course, the attendees were also taught how to take the base file and design their own! That’s the point of attending one of my retreats! : ) Fortunately, it such a simple process in KNK Studio, that I can show it in just a few screen quick shots:
Select a petal and size it to the height you want and then arrange over the left side of one of the rectangles. You’ll see, in the inventory file, that I have two sets of rectangles… pick from the upper set for shorter flowers or from the lower set for slightly taller flowers.

Next select the flower petal and go to Layout>Array. Make the following changes to your settings. Note that your spacing and the total number might vary from what I have. No problem! That’s the beauty in the designing of these flowers… it doesn’t matter!

Click screen shot to enlarge, then use back button to return
Now close that Array window, select your petals and rectangle and apply the Basic Weld. You’re done!

Now do another sized petal or a flower center or even a leaf. Just be creative and have fun!
Note, if you’re designing in a software program lacking something like the Array function in KNK Studio, then just manually copy/paste the petals and arrange along one of the rectangles. Then select all and weld. The petals do not have to be equally spaced in order to create one of these flowers!
For those who need to learn how to quill, here’s a link to one of the You Tube videos.
Quilling Demo
The only difference between my technique and what’s shown in this video is that I like to apply a small amount of adhesive (glue stick) along the strip before quilling to make it more secure. And, I also apply liquid glue to the bottom of my quilled flowers to make them even more permanent for a lot of handling (I do this since I take these flowers to demos, retreats, etc). Also, if you notice, as you are quilling that the petals seem to be clustering in the same spots, just unwrap a bit, and tear off the strip and glue down the end. Then move over a bit and start again so that the next petal will be positioned in one of the gaps in your pattern.
For those who do not own a quilling tool, here’s a link to the slotted quilling tool (Product 301) that I gave everyone at the retreat:
Quilling Tool
Also, I’ve learned that the Curling Coach (top right, Product 311) is supposed to be REALLY nice when quilling these flowers. I haven’t tried one yet, but I do plan to.
So… this is a VERY easy project! Have fun and feel free to send me any photos of beautiful flowers you’ve designed and created yourself.

by Sandy McCauley | Apr 15, 2009 | Array, Designing, File Extensions, File Import, Flourishes - Designing, Free Videos, GSD Files, GST Files, KNK, MAXX, Outlining Images, Print and Cut, Reducing Nodes, Round Corner, Sign Blank, Toolbars, Welding
Today I’m covering TWO topics that have been brought up by customers. The first is importing the GST template files that come with Craft Robo’s RoboMaster, Silhouette RoboMaster, and Wishblade Advance 3.0. The other is importing GSD files into KNK Studio.
With the GST files, we’ve had great success with the imports. I’m sure it has to do with how they are originally created but they all seem to work. Even the GST files purchased from Quickutz through their Silhouette software will import readily once the file extension is changed to a GSD. Here’s the video showing you how to do this:
Importing GST Files into KNK Studio
However, the GSD’s that are created from the umpteen different ways possible: manually drawn in various versions of RoboMaster, auto-traced in various versions of RoboMaster, imported from Inkscape, imported from Adobe Illustrator, imported from Win PC Sign, etc, all yield variations and only some will successfully import. However, it’s always worth trying the import before using one of the several conversion methods. But you have to watch out… sometimes it will import and not seem to be there or will only partially import, or will import with gaps in the vector paths.
So the following video shows you 6 different circumstances you might encounter when importing GSD’s. If you find something else quirky happening, be sure to send me the file. I’m happy to have a look and maybe I’ll learn something else to share here.
Importing GSD Files into KNK Studio
by Sandy McCauley | Mar 24, 2009 | Array, Flowers - Designing, Free Files, Free Videos, Outlining Images, Transformation

Thanks to Pam Z for requesting help in designing a particular kind of flower to cut from vinyl. As always, these requests motivate me to try new things in the software and I found a way to design a different kind of petal and then use the circular Array function to create a quick flower from the petal. The video can be viewed at:
Creating a Hollow Petal Flower
If you’d also like the .knk file of the two flowers I show above, then just grab it from here:
Hollow Petal Flowers
by Sandy McCauley | Oct 28, 2008 | Array, Circles, Free Videos
I’ ve had a couple of customers email me about the last post in which I recommended using Layout Array to fill the wedge into a circle formation (which was Carol’s terrific idea!). Anyhow, these customers were having problems getting it to work just right, so I created a Part 2 video showing just this part. Hope this answers your questions. 🙂
Dividing a Circle Into Equal Segments: Layout Array
by Sandy McCauley | Oct 25, 2008 | Array, Circles, Orange Slices - Designing, Ordering Objects, Round Corner
What I thought was a somewhat trivial blog post yesterday became far more interesting after receiving some member input from the Yahoo groups. Two things came to light:
- The circle divide can be used to create citrus slices
- I could have made the task a lot easier by using the Layout>Array function! (Duh me!)
So, here’s Part 2… no video, but if you watched yesterday’s video, just stop after you create the first wedge and rotate it manually until it’s in a vertical position like this:
 Next, go to Layout>Array and select On Arc With Rotation from the drop down menu on the Smart Bar. Set your Start and End at 0 and 360. Don’t worry about the next setting (Arc Radius) quite yet. Just start clicking on Total and then you can go back and increase or decrease Arc Radius so that the wedges are spaced exactly the way you want. When you’re happy with the look, click on Close and then delete the original wedge in the middle:
 Now, let’s make it look more like an orange slice. Select the wedges and color them orange. Then go to Transform>Round Corner and play with the setting until you achieve the amount of roundness on the corners that will make it look more like a real orange:

Lastly, just add a yellow circle to the back and another orange circle to the back. If you’re not familiar with the ordering hot keys: Ctrl-L moves an image back one position and Ctrl-B moves it to the very back; Ctrl-U moves an image forward one position and Ctrl-F moves it to the very front. And here’s the final product:


