by Sandy McCauley | Jul 24, 2009 | Fit Object to Path, Free Videos, Retreats, Rhinestones, Stenciling

Well, as usual, I have a customer to thank for an AMAZING idea! Kaylene asked if we could use the Stencil tool under the Shapes menu to create some patterns for rhinestone applications and the answer is, “You becha!” This will open up even more possibilities for creating unique and interesting patterns to fill your shapes or even just letters. The video shows just a few examples. The important thing to remember with this tool, is that you need to weld the shape after you leave the Stencil Smart Bar to remove the stenciling lines. Otherwise, it’s a very easy process!
Thanks, Kaylene!
by Sandy McCauley | Jul 16, 2009 | Fit Object to Path, Free Videos, Hearts - Designing, Metamorphosis, Rhinestones

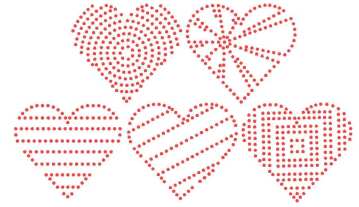
In the previous post, I show how to use Transform>Inline in KNK Studio to create a fill pattern for rhinestone applications. In today’s video, I show how to use Transform>Metamorphosis, which is perfect for symmetrical designs, such as a heart, a flower, a sun, etc. This is how I did my own T-Shirt design in the orginal, “Rhinestones, Baby!” post from last week. It’s both interesting AND fun to try both and then decide which look you like best. I have to again thank, Gerti, for asking how to create nesting shapes for today’s video, too! If I hadn’t revisited the Metamorphosis function to answer her question on June 28, then I wouldn’t have thought to extend this same application to rhinestone pattern designs! Thanks, Gerti!
by Sandy McCauley | Jul 14, 2009 | Fit Object to Path, Free Videos, Outlining Images, Rhinestones

There are several ways to fill a rhinestone pattern using KNK Studio. The video I have for you today shows how to use Transform>Inline to create a series of progressively smaller inlines to then use in aligning circles along a path. Then we use the same Transform>Fit Object to Path to get the circles aligned along the circles. You will need to tweak the locations of the circles to get the perfectly look, but again it’s just a case of shift them around with your mouse and adding/deleting as necessary. : )
by Sandy McCauley | Jul 10, 2009 | Fit Object to Path, Free Videos, Rhinestones
I had extra time this morning, so I created both of the text videos to upload and announce. The first video covers locating and using the engraving fonts that come free with the KNK Studio software program. There are two types: those with single lines, such as Jott:

and then the types with internal lines, such as 5 Bodkin:

The second video covers using your own fonts and either aligning the rhinestones along the outer lines OR using Center Line Trace to convert the font to a single line similar to the engraving font, Jott, above. The resulting patterns for these fonts appear like this:

So, you have a number of options for handling text and there’s even a couple more. Be sure to check out the next tutorial which will be the first of two tutorials on filling images with circles.
by Sandy McCauley | Jul 9, 2009 | Free Videos, Rhinestones
As promised yesterday, I’ll be presenting free videos to teach you everything you need to know about designing rhinestone patterns in KNK Studio. The first video shows you the technique of using Transform>Fit Object to Path function to align circles along a vector path.
Fitting Circles to a Path
The important things to remember from this video are:
- Size your image before adding the circles.
- Size your circle by looking up the maximum diameter for your rhinestone and then adding 0.1 mm to that size. Thus for an SS16 rhinestone, which has a maximum diameter of 2.9 mm, you will want to draw a 3.0 mm circle.
- Always choose Nodes and Distance in the Transform>Fit Object to Path window.
- The spacing you enter in the Transform>Fit Object to Path window should be the size of the circle PLUS the distance you want between the stones.
- Examine your image carefully to see if any circles are too overlapping or two close together. Tweak as needed.
Tomorrow, I’ll have a video on the various options for text.
by Sandy McCauley | Jun 24, 2009 | Fan Shape Tool, Free Videos, Guidelines, Polyarc

Rachel in New Zealand contacted me yesterday with a design request. She wanted to recreate a slightly unusual welded word title she had found on a card. The above screen shot shows the image based on the design she sent to me. So, how do you create it easily? Well, maybe you would like to give it a shot yourself first in KNK Studio before watching the video. Hint… I started with the Fan Shape.
Modified Fan Video
If you are interested in learning more about welded lettering, be sure to check out two videos I sell in my store: Creating Welded Letter Titles and Creating Monograms. I now sell directly via Paypal and my videos can also be purchased at Scrapbook Die Cutter via credit card and Paypal.


