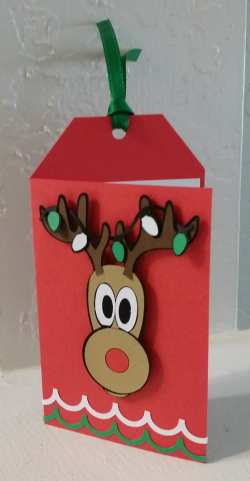
Free Popup Gift Tag
I love Popup Card Studio SOOOO much that after signing up for a Christmas-themed gift tag swap, I immediately decided to design a gift tag that would also be a popup card:
I wanted a whimsical design and easily located a free Rudolph image using Google and traced it in MTC. I employed my usual approach of starting the design in MTC where it always seems easier to visualize the final product. I used a free font called Christmas Light Indoor for the To and From elements. Then I copied and pasted those into Popup Card Studio and created the popup design for the inside of the tag. I exported this popup as an SVG file to reopen in MTC. It’s important to note that if you are a KNK Force owner, you need to do this so that the fold lines can be broken and rejoined before the file is exported and opened in C3 for cutting to the Force.
I used both the Maxx Air and the Force to cut all parts. Because the Force has easy and accurate PNC, I used it for the colored To/From pieces and for the Merry Christmas greeting. I also used it for the popup insert because the Force has dual heads, thus capable of scoring and cutting the popup all in one step. Given that I was making 16 of these tags, I needed efficiency!
While the Force was doing its cuts, the Maxx Air handled the cutting of 16 sets of red, white, green, light brown, dark brown, and black pieces used in these tags. Now, if only KNK USA would come up with a machine to do all of that tedious gluing it took to create Rudolph’s head! LOL When I started organizing the file to share with everyone, it occurred to me that some crafters might like Rudolph to also be a single PNC element so that the tedious gluing of small pieces would be eliminated. No problem! I added several variations to the file that I’m sharing here.
The file contains an MTC format file, a SCAL format file, and individual SVG files for those cutting with the Force or importing into a different program. Also, for those using other design software, the PNC elements have been included as individual PNG files. To verify sizing, the tag should be 4.75″ in height.
If you’re into popup cards, think about buying Popup Card Studio. It takes a little practice maneuvering in the software but there are lots of free videos to help you learn it:
and dozens of other PCS videos here: Susan Bluerobot
If you have any questions, please post!


