Page 214 - KNK Groove with MTC User Manual
P. 214
Arrange pattern on shirt, carefully centering. Press for 10-12 seconds.
Peel cold, cover with Teflon sheet, and re-press another 10-12 seconds. Alternatively, flip the shirt
inside out and press from the back for 10-12 seconds.
Use a lower temperature if pressing on 50/50 cotton poly fabric. Use a higher temperature on denim or
tote bags.
Extra tips on Rhinestone Applications
If you are combining iron-on transfer with rhinestones, do not press the rhinestones onto the iron-on vinyl.
While it will appear to have worked well, the stones will fall off once the garment is laundered. When using
both, create a contour line around your iron-on pattern for the stones.
Pressing rhinestones to cardstock also works very well. If pressing onto the front of a greeting card, unfold
the card first.
After pressing and allowing to cool, use your fingernail or an old credit card/gift card to scrape the pattern to
see if any stones come loose. If so, replace those stones with new ones and press again.
10.07 Drawing with a Pen or Glue Pen
With the Maxx, Groove, and Groove-e, you can draw with any pen, pencil, marker, or glue pen, that can be
securely gripped by the blade holder seat and not be dragging across the material. The optional Zing Pen
Holder can also be used to hold thinner pens. The advantage of the Pen Holder is that the center of the pen
will be positioned the same as the blade on the Maxx / Groove-e Blade Holder, thus allowing you to draw
with the pen and then cut out a shape. The pen will draw in the correct relative positions to the cut:
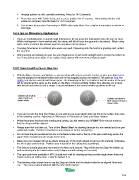
Outside cut circle is
aligned with pen Outside cut circle is
drawn circle NOT aligned with pen
drawn circle
If you do not own the Zing Pen Holder or you wish to use a pen which does not fit into the holder, then refer
to the following section: Adjusting for Differences in Diameters of Tools and Blade Holders.
When the project involves both drawing and cutting, you will need to use WYSIWYG for the cut mode so
that the shapes will be aligned.
Always draw first and then cut. Turn off the Blade Offset for drawing because it is not needed and can give
undesired results. But then remember to turn it back on for the cut process.
Do not have the pen positioned too low in the blade holder seat or the tip of the pen could drag across the
paper when moving from one shape to the next.
Make sure your shapes will not be drawn where any of the pinch wheels travel over the material. Otherwise,
the ink or glue could smear. Position your material on the cutting mat accordingly.
The Sakura Quickie glue pens work well in the Maxx and Groove. They will fit into the Zing Pen Holder, as
well as directly into the blade holder seat (if alignment with cutting isn’t needed).
The open path fonts available in MTC should work well for drawing as they provide single drawn lines and
curves versus an outline form. Refer to Section 5.11.
The following video shows how to use the Zing pen holder and the blade holder for an aligned “draw and
cut.” This same method will work with the other KNK models:
214