Page 215 - KNK Groove with MTC User Manual
P. 215
The following video shows how to use a glue pen and the blade holder for an aligned “draw and cut.” This
same method will work with the other KNK models:
Adjusting for the Difference in Diameters of Tools and Blade Holders
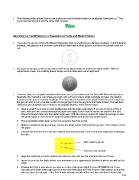
If you plan to use two tools with different diameters, then you will face an alignment problem. In the following
example, two glasses and an inner circle will be drawn with a silver gel pen and then the outside circle cut
out.
Because the gel pen is thin, it sits further back in the blade holder seat than the blade holder. With no
adjustments made, the resulting drawn image and cut circle were out of alignment:
However, there is a straight-forward method one can use to compensate for tools with different diameters.
Basically, this method is one where you mark onto a Post-it note or small rectangle of paper, the relative
locations of the gel pen and the blade tip. Then you use the location of the blade holder to set the origin for
the gel pen and, in turn, use the location of the gel pen to set the origin for the blade holder! This will then
allow your pen drawings and cut lines to be properly aligned. Here are the steps:
Align a small Post-it note on your gridded mat with the sticky side down. If you do not have a Post-it
note, then just use a small rectangle of paper and apply Scotch tape to secure the paper to the mat.
Place the blade holder into the blade holder seat. With the Groove turned off, slide the carriage so that
the blade holder is over the note. Drop the pinch wheels so that the mat cannot move.
Press the blade holder down so that you puncture the Post-it note.
Without moving the blade carriage, remove the blade holder and insert the gel pen. Press down to mark
the paper.
Remove the mat and use a pencil to darken the puncture mark. Your Post-it note might look something
like this:
Mark made by gel pen
Puncture made by blade
Align the cardstock (or other material you plan to use) onto the mat and load into the Groove.
Insert the pen into the blade holder seat and move to the approximate location of where you will set the
origin.
Position the Post-it note where you plan to set the origin (laser light) for your WYSIWYG cut. If you
normally set it at the lower right corner of the mat, then place the Post-it note in that position so that the
dots are close to that spot. If the Post-it note extends outside of the mat, trim it so that it doesn’t get
215